Step-by-Step Techniques for Newbie Welders
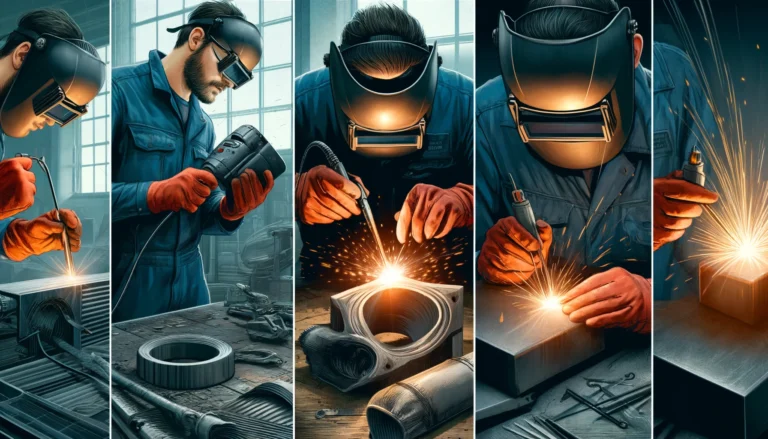
Introduction to Welding
So, let’s learn about Welding!
What is Welding exactly I hear you cry!?
Well the first thing you should know is that it is easily a fundamental skill used in various industries to join materials, typically metals, by causing what is called in the industry coalescence.
So coalescence involves melting the workpieces and adding a filler material to form a strong joint once it’s cooled. Keep in mind its important to understand the basics and key principles of Welding, especially as a beginner and anyone looking to pursue a career in manufacturing, construction, automotive repair, or even for personal DIY projects, as welding can and is often loved by people as a hobby, myself included 🙂
There are several types of welding processes, including:
- Arc Welding: Uses an electrical arc to melt the base metal and filler material.
- MIG (Metal Inert Gas) Welding: Uses a continuous wire feed as an electrode and an inert gas to protect the weld pool from contamination.
- TIG (Tungsten Inert Gas) Welding: Uses a non-consumable tungsten electrode and an inert gas for precise and high-quality welds. Learn How to set up for Tig Welding here. See the Best Tig Welders Here.
- Stick Welding: Uses a consumable electrode coated in flux to lay the weld.
On your new journey of welding it is worth knowing that each welding process has its own techniques and applications, making it crucial for beginners to start with the basics and gradually advance to more complex methods or you could simply learn and enjoy the basics or what you actually need and keep at that level for as long as you want 🙂
More complex methods of welding are often required on a professional level, ie career.
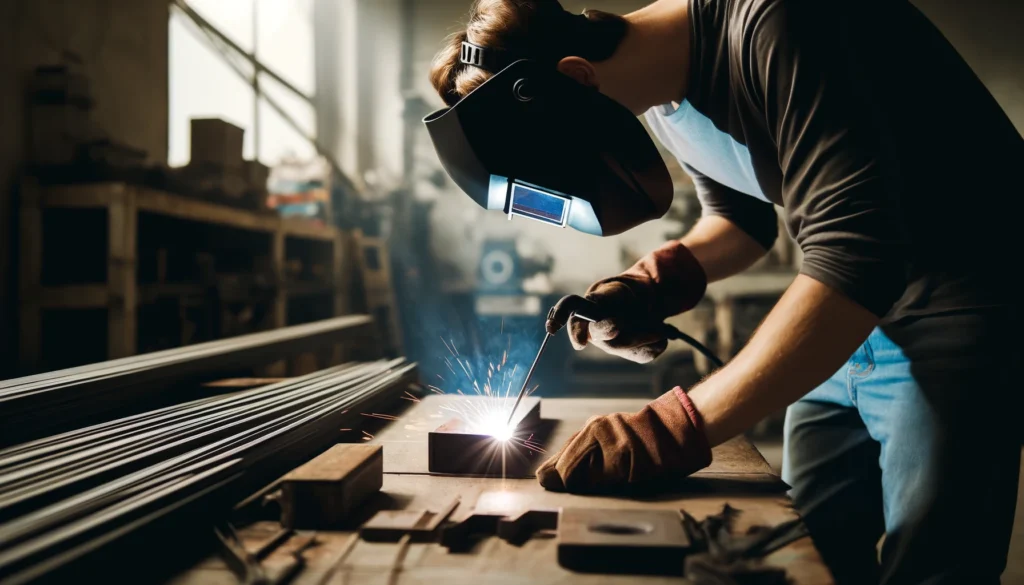
Welding Safety
One of the best tips I can advise anyone whose new or rating to learn about welding is to start off on the right foot, safety is the top priority in welding.
With the intense heat, bright light, and molten metal involved in welding can and often do pose a serious risk of injury. when a plan or care isn’t taken or the wrong tools or safety gear is used.
Here’s a breakdown of essential safety measures every beginner welder must follow:
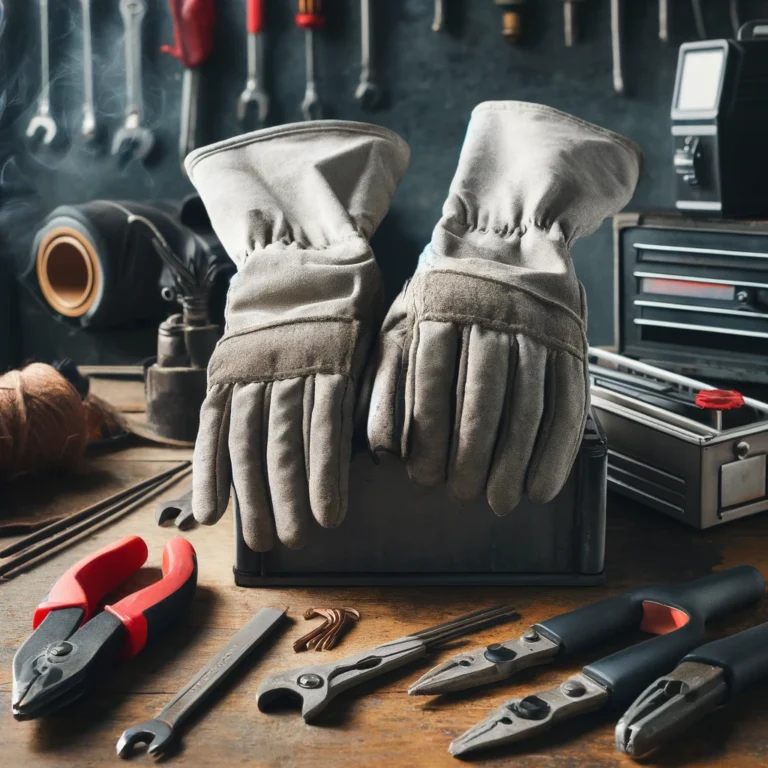
- Safety Gear:
- Welding Helmet: Protects your eyes and face from harmful UV and infrared rays, sparks, and spatter.
- Gloves: Use heavy-duty, heat-resistant gloves to protect your hands from burns and electric shock.
- Protective Clothing: Wear long sleeves, pants, and an apron made of flame-resistant material to shield your body.
- Boots: Use sturdy, closed-toe boots to protect your feet from falling objects and hot metal.
- Ventilation and Workspace Setup:
- Ensure your workspace is well-ventilated to avoid inhaling harmful fumes and gases produced during welding.
- Use a fume extractor if working indoors or in a confined space.
- Keep your workspace clean and free of flammable materials to prevent fire hazards.
- Handling Equipment Safely:
- Always inspect your welding equipment before use. Check for any damage or wear in cables, connections, and the welding machine.
- Never touch live electrical parts with bare skin or wet clothing.
- Ensure your workpieces are securely clamped and positioned to prevent movement during welding.
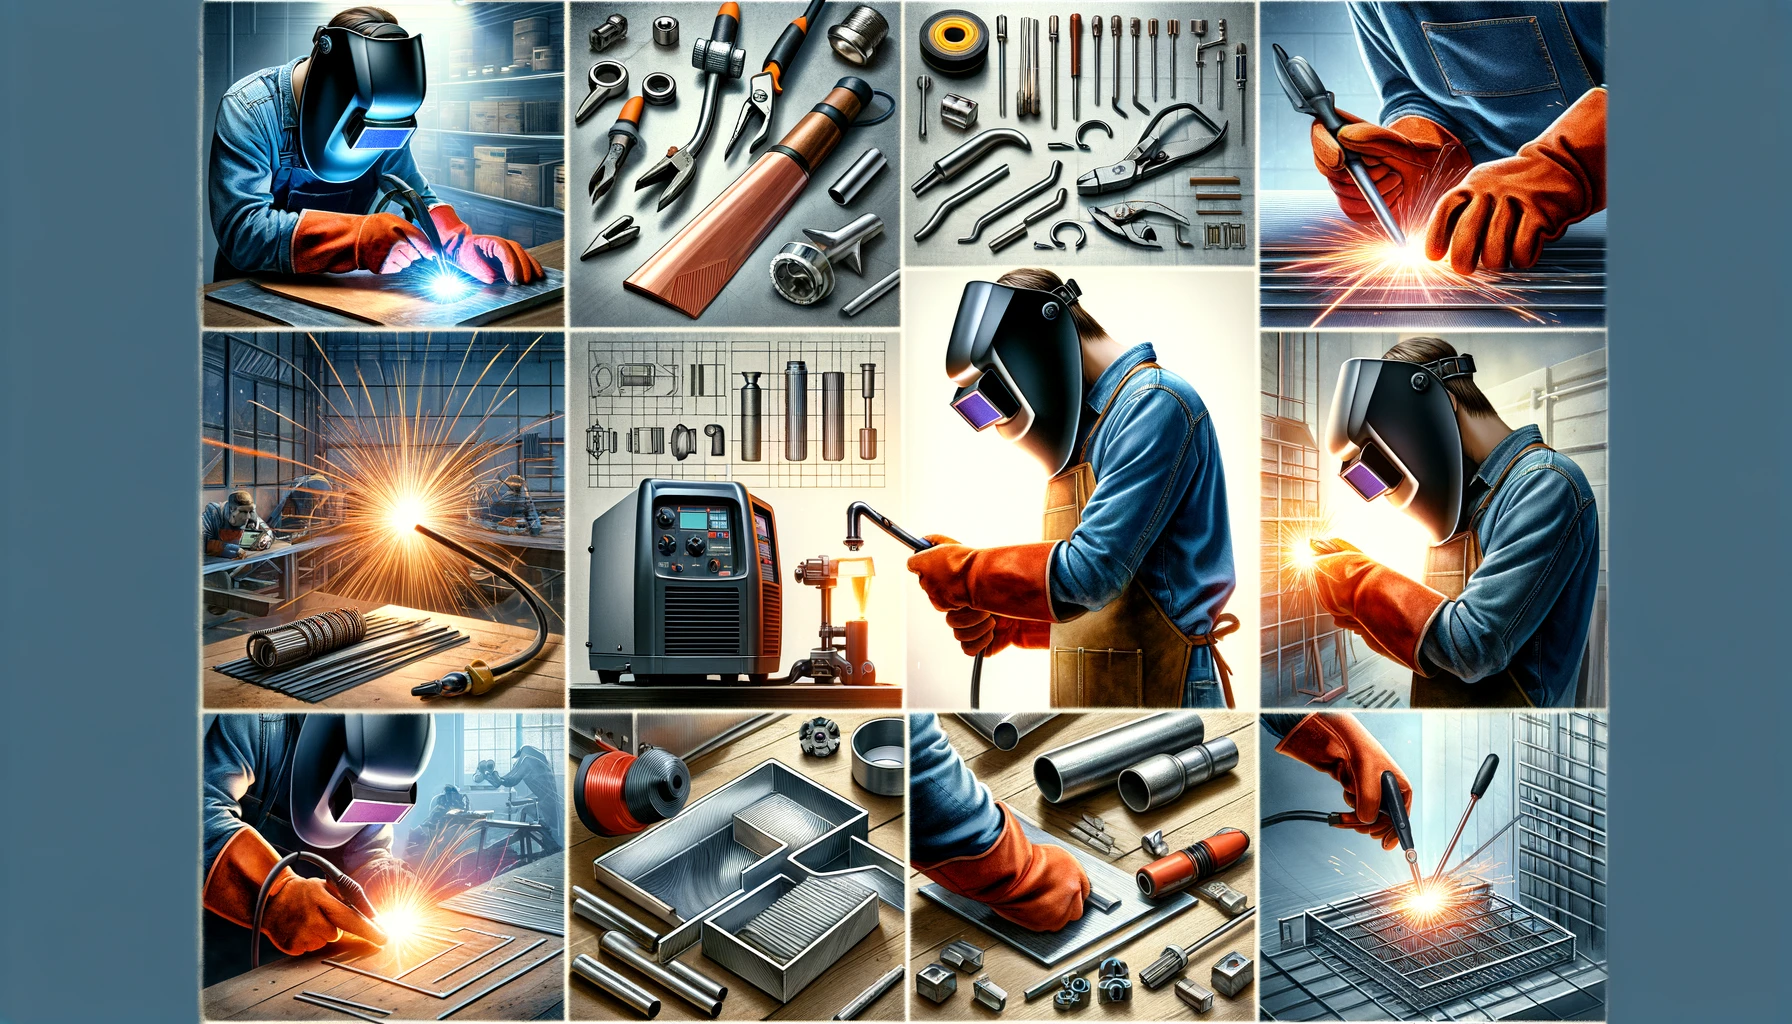
Understanding Your Equipment
Now before you start welding, first things first, familiarize yourself with the basic equipment used in the process, is vitally important, have a good idea is to what’s required on what basically needs to happen, don’t go in blind; so to speak.
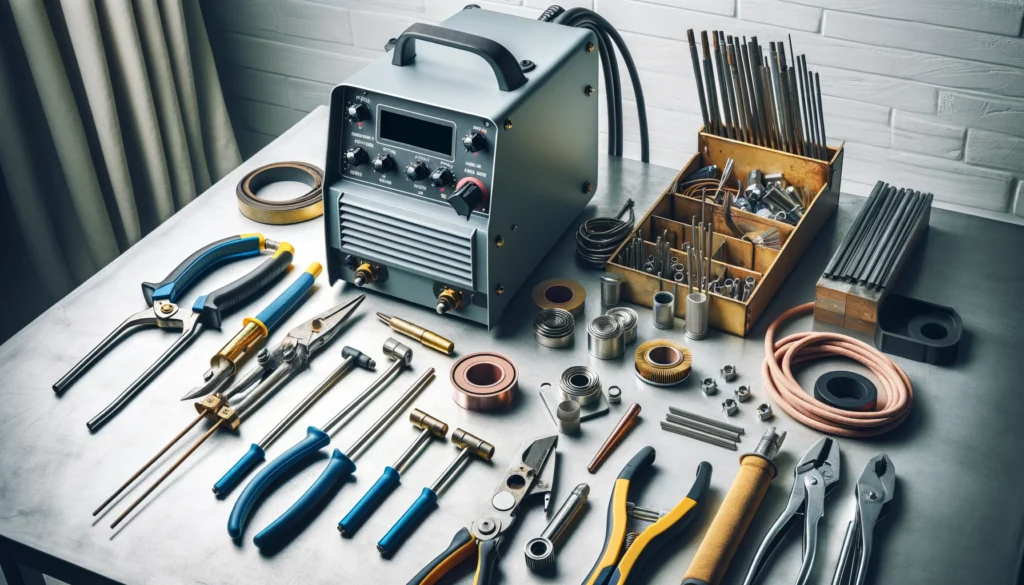
Knowing how to properly set up and operate your equipment is crucial for successful and safe welding.
- Welding Machine:
- The welding machine, also known as a welder or power source, provides the necessary electrical current to create the arc.
- There are different types of welding machines, including transformer-based welders, inverter welders, and engine-driven welders. For beginners, a basic transformer-based welder is often recommended.
- Electrodes:
- Electrodes are essential in welding as they conduct the current and melt to form the weld.
- There are consumable electrodes (used in processes like stick welding and MIG welding) and non-consumable electrodes (used in TIG welding).
- Common types of consumable electrodes include E6010, E6011, E6013, E7018, each suited for different types of joints and materials.
- Clamps and Grounding:
- Clamps are used to hold the workpieces together and ensure they remain stationary during welding.
- The grounding clamp is connected to the workpiece to complete the electrical circuit, ensuring the current flows properly and safely.
- Welding Machine Settings:
- Adjusting the settings on your welding machine is crucial for producing a quality weld.
- Key settings include voltage, amperage, and wire feed speed (for MIG welding).
- Start with the manufacturer’s recommended settings for your specific welding process and material type, then fine-tune as needed based on your practice welds.
Setting Up Your Workspace
Always set up your workspace and make it suitable for you, ultimately it is going to be the area that you’re going to be working in, you need to know where the hazards are and where everything is so you can easily reach it so you’re not fumbling around.
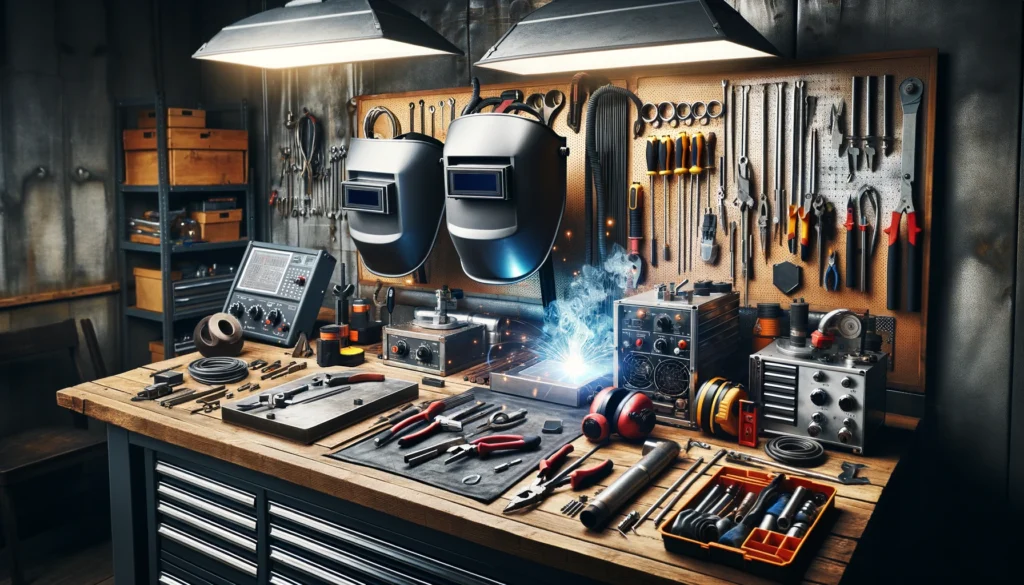
Here’s how to set up your welding area properly:
- Clean and Organize Your Work Area:
- Ensure your workspace is clean and free of clutter. Remove any flammable materials and debris that could pose a fire hazard.
- Organize your tools and materials so they are easily accessible. This helps you work more efficiently and reduces the risk of accidents.
- Secure Your Workpieces:
- Use clamps or vises to hold your workpieces securely in place. This prevents movement during welding, ensuring more precise and consistent welds.
- Make sure the workpieces are positioned at a comfortable height and angle to allow for proper welding technique and reduce strain on your body.
- Ensure Proper Ventilation:
- Good ventilation is critical to avoid inhaling harmful fumes and gases produced during welding.
- If you are welding indoors or in a confined space, use a fume extractor or an exhaust fan to maintain air quality.
- Position your welding table near an open door or window if possible, to allow fresh air to circulate.
Basic Welding Techniques
Ultimately many new people entering in the welding world want their end game to be a mastering of their craft. This will also mean the outcome is creating a stronger and more reliable weld, which really is the goal for all of us at the end of the day!
So with that said, Here are the foundational techniques every beginner should practice:
- Striking an Arc:
- Striking an arc is the process of initiating the welding arc between the electrode and the workpiece.
- To strike an arc, tap the electrode against the workpiece and then quickly lift it to create a stable arc.
- Practice striking the arc until you can do it consistently without sticking the electrode to the workpiece.
- Maintaining a Consistent Arc Length:
- The arc length is the distance between the electrode and the workpiece. Keeping a consistent arc length is crucial for even welds.
- If the arc length is too short, the electrode may stick to the workpiece; if it’s too long, the arc may become unstable and produce excessive spatter.
- Aim for an arc length approximately equal to the diameter of the electrode.
- Moving the Electrode Smoothly:
- A smooth, steady hand movement is key to producing a uniform weld bead.
- Move the electrode along the joint at a consistent speed, maintaining a steady arc length and angle.
- Practice different hand movements, such as weaving or circular motions, to produce different types of weld beads.
It is highly advised that all welders, especially new welders practice the above techniques. These are some of the foundations of what you need to become a sound welder.
Start simple, start with scrap metal and then gradually build up to more complicated joints and other materials.
Remember – practice makes perfect! 😀
Common Weld Joints
As part of your arsenal, are welders need to know and fully understand the different types of a welder joints, this obviously something that all began as a new business to welding will have to learn.
Here is a little help with that, mentioning the most common joints you will likely come across:
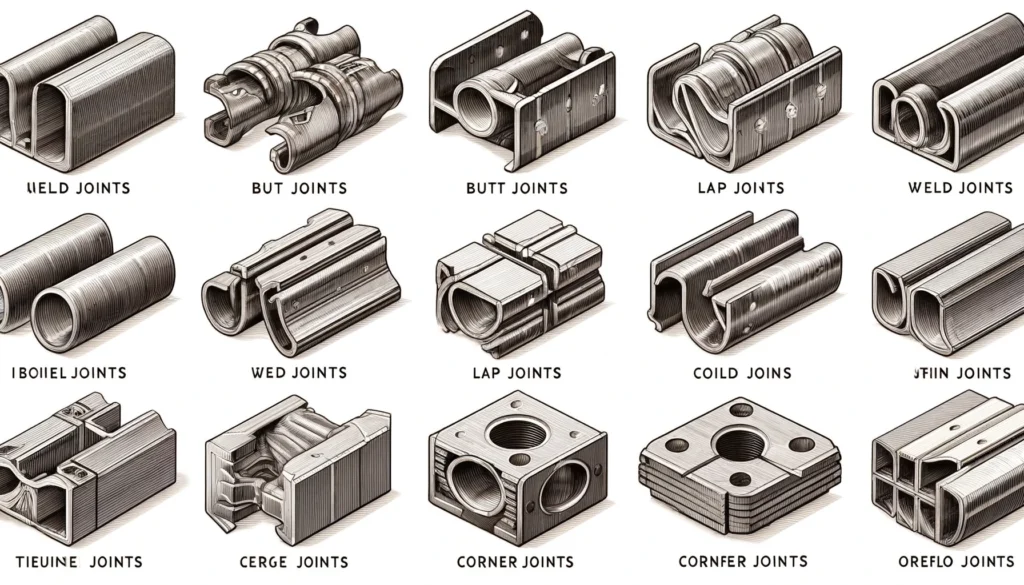
- Butt Joint:
- Description: Two pieces of metal are placed edge-to-edge in the same plane.
- Application: Commonly used in pipelines, frames, and structures where a flat surface is required.
- Technique: Ensure the edges are clean and properly aligned. Use a root pass followed by filler passes to complete the weld.
- Lap Joint:
- Description: One piece of metal overlaps another.
- Application: Often used in sheet metal work and situations where the pieces cannot be aligned edge-to-edge.
- Technique: Weld along the edges of the overlapping area, ensuring good penetration into both pieces.
- T-Joint:
- Description: One piece of metal is positioned at a 90-degree angle to another piece, forming a “T” shape.
- Application: Commonly used in structural applications and frameworks.
- Technique: Weld along both sides of the vertical piece where it meets the horizontal piece. Use multiple passes for thicker materials to ensure strength.
- Corner Joint:
- Description: Two pieces of metal are joined at their edges to form a 90-degree corner.
- Application: Often used in box frames, sheet metal, and structural components.
- Technique: Clean the edges thoroughly. Use tack welds to hold the pieces in place, then weld along the joint, ensuring good penetration and smooth bead appearance.
- Edge Joint:
- Description: The edges of two pieces of metal are placed together and welded along the same edge.
- Application: Used when joining thin sheets of metal or when the joint does not need to bear significant loads.
- Technique: Align the edges properly and weld along the length of the joint. Use a consistent arc length and travel speed to avoid burn-through on thin materials.
- Fillet Joint:
- Description: A triangular cross-section weld joining two surfaces at right angles to each other, often used in T-joints, lap joints, and corner joints.
- Application: Commonly used in structural and fabrication work.
- Technique: Use a smooth, consistent motion to create an even fillet weld. Ensure proper heat input to achieve good penetration and avoid defects.
If you are serious about welding, either for a porfesaion or just for a hooby, one thing I strongly advise is to familiarizing yourself with these common weld joints.
Ideally, Practice welding each type of joint to develop your skills and confidence as a welder, this should be defiantly done by beginners and even advised for more experienced welders
Practicing Your Welds
The most important thing you can do when it comes to welding, whatever level you are out, is practice, practice, practice!
Here’s how to practice effectively:
- Start with Scrap Metal:
- Use scrap metal pieces to practice your welding techniques without worrying about wasting materials.
- Different thicknesses and types of scrap metal will help you understand how various materials respond to welding.
- Practice Straight Lines:
- Begin by welding straight lines on flat pieces of metal. This helps you develop a steady hand and consistent arc length.
- Focus on maintaining a uniform bead appearance and avoiding common issues like undercutting or excessive spatter.
- Move to Circles and Curves:
- Once you are comfortable with straight lines, practice welding circular and curved patterns. This will improve your control and ability to weld around joints and corners.
- Start with large circles and gradually work on smaller, tighter curves as your skills improve.
- Experiment with Different Positions:
- Practice welding in various positions such as flat, horizontal, vertical, and overhead. Each position requires different techniques and adjustments to achieve quality welds.
- Begin with the flat position, which is easiest for beginners, and progress to more challenging positions as you gain experience.
- Join Different Types of Joints:
- Work on different types of weld joints such as butt joints, lap joints, T-joints, and corner joints. Each joint type presents unique challenges and helps you develop versatile welding skills.
- Pay attention to alignment, clamping, and tack welding to ensure stable and accurate joints.
I cannot stress enough, like with things in life, repetition with any process or skill takes time. Through repetition and practice you will almost defnately improve your skills and become a better welder. Which is why I cannot reccomendit enough.
Troubleshooting Tips
As a beginner, you will likely encounter various issues while welding.
Okay, so Nobody’s Perfect, not even us welders, I’m sorry to say 🙂
So you will Encounter troubleshooting problems, but here are some common ones that hopefully we can pre-diagnosis and help you with:
- Porosity:
- Problem: Small holes or cavities in the weld bead caused by trapped gas.
- Solution: Ensure your workpiece is clean and free of contaminants like oil, rust, or paint. Check for proper shielding gas flow and coverage. Avoid drafts and ensure adequate ventilation.
- Undercut:
- Problem: A groove melted into the base metal along the weld toe, reducing the strength of the weld.
- Solution: Reduce the welding speed and ensure proper electrode angle. Lower the amperage if necessary and maintain a consistent arc length.
- Spatter:
- Problem: Small molten metal droplets scattered around the weld area, making the weld look messy.
- Solution: Adjust the amperage and voltage settings on your welding machine. Use anti-spatter spray and maintain a stable arc length and angle. Ensure your workpiece and electrode are clean.
- Incomplete Fusion:
- Problem: Lack of proper bonding between the weld metal and base metal, resulting in weak joints.
- Solution: Increase the heat input by adjusting the amperage. Ensure proper electrode manipulation and travel speed. Clean the joint area thoroughly before welding.
- Cracks:
- Problem: Visible cracks in the weld bead or base metal, compromising the weld strength.
- Solution: Preheat thicker materials to reduce thermal stress. Use the correct electrode and filler material for the base metal. Avoid excessive heat input and allow the weld to cool slowly.
- Overlapping:
- Problem: Weld metal rolls over the base metal without proper fusion, creating weak joints.
- Solution: Adjust the electrode angle and travel speed. Reduce the amperage if necessary. Ensure the arc length is appropriate for the electrode size.
By understanding these common welding issues and their solutions, beginners can improve their troubleshooting skills and produce higher-quality welds.
The soon you learn these common welding issues, the sooner you’ll understand what they are and also be able to implement Solutions.
Hopefully, the outline of the most common welding issues above will help with that, but always be on the lookout for other troubleshooting issues, this list is by no means exhaustive.
Final Tips and Best Practices
To be certain that you are going to be heading in the right direction, here is my best practice is and final tips to take away, a bit of food for thought as it were 🙂
- Keep Your Equipment Well-Maintained:
- Regularly inspect your welding machine, cables, and electrodes for any signs of wear or damage.
- Clean your equipment after each use to prevent buildup of debris and contaminants.
- Replace worn-out or damaged parts promptly to ensure safe and effective operation.
- Always Prioritize Safety:
- Never skip wearing your safety gear, including your helmet, gloves, and protective clothing.
- Be aware of your surroundings and keep your workspace clean and free of hazards.
- Continuously review and adhere to safety guidelines to protect yourself and others.
- Continuously Learn and Improve:
- Take advantage of available resources such as books, online tutorials, and welding courses.
- Join welding communities and forums to share experiences and learn from other welders.
- Stay updated on new techniques, technologies, and industry standards.
- Practice Consistently:
- Set aside regular time for practice to keep your skills sharp and improve steadily.
- Work on a variety of projects to gain experience with different materials and welding positions.
- Reflect on your progress and identify areas for improvement.
- Pay Attention to Details:
- Focus on proper preparation, including cleaning and aligning workpieces before welding.
- Take your time to ensure each weld is done correctly, rather than rushing through the process.
- Inspect your welds carefully to identify any defects and learn how to correct them.
Welding isn’t difficult, like anything in life if you know what to do and how to do it then you can master almost anything in life. my intention with this article was to outline, not everything, but most of the common issues, or mistakes, are most important aspects of welding that you should be aware of.
Once these are mastered any welder can then move onwards onto a level of skill which brings attention to detail, and a commitment to safety all combined will inevitably lead to a high quality of results if your welding endevours.
Resources and Further Learning
To expand your welding knowledge and skills, here are some valuable resources and opportunities for further learning:
- Recommended Books:
- Welding For Dummies by Steven Robert Farnsworth: A beginner-friendly guide covering various welding techniques and tips.
- The Welder’s Handbook by Richard Finch: A comprehensive manual that covers different welding processes and projects.
- Welding Essentials by William L. Galvery and Frank B. Marlow: A practical guide to the fundamentals of welding.
- Online Tutorials and Courses:
- YouTube: Channels like Welding Tips and Tricks, Weld.com, and The Fabrication Series offer free video tutorials on a wide range of welding topics.
- Udemy: Online courses such as “Welding for Beginners” provide structured lessons and hands-on projects to help you learn at your own pace.
- Coursera: Courses from institutions like Georgia Institute of Technology offer in-depth learning on welding and related engineering concepts.
- Welding Communities and Forums:
- WeldingWeb: A popular forum where welders of all levels share advice, projects, and experiences.
- Reddit: The r/Welding subreddit is an active community where you can ask questions, share your work, and get feedback from fellow welders.
- Local Classes and Workshops:
- Check community colleges, trade schools, and vocational centers for welding courses and workshops.
- Many local welding supply stores also offer classes and demonstrations.
- Industry Certifications:
- Pursue certifications from organizations like the American Welding Society (AWS) to validate your skills and enhance your career opportunities.
- Certifications such as Certified Welder (CW), Certified Welding Inspector (CWI), and Certified Welding Educator (CWE) are highly regarded in the industry.